Start with saves, upgrades, and map markers
Your first priorities in Castlevania: Belmont's Curse are defeating The Fallen, unlocking the Arcane Whip, and activating save mirrors along your route. These milestones unlock combat options and exploration routes. Mark blocked passages so each new ability gives you a clear destination.
Rose Belmont arrives in Paris with her father, Trevor, as monsters overrun the city in 1499. Her investigation leads through sewers, cemeteries, towers, and Dracula's Castle. Progress depends on defeating guardians, solving environmental puzzles, and returning to earlier areas with new abilities.
Build these habits early:
-
Activate every Mirror of Life. These checkpoints save progress, restore health, and replenish potions.
-
Mark unfinished routes. Use distinct markers for inaccessible platforms, locked doors, and unopened treasure.
-
Mix weapon attacks with spells. Regular weapon hits restore Mana, helping sustain your magic.
-
Adjust visibility settings. Reduce screen shake or enable contrasting character outlines if crowded fights become difficult to read.
-
Consider remapping dodge. A shoulder button can make dodging more comfortable while keeping your thumb near the attack controls.
Reach the sewers and defeat The Fallen
The opening route runs from the docks through the Ruined Market and into the sewers. The market's sealed well is the first significant navigation puzzle.
-
Travel right from the docks toward the River Seine, completing the movement and combat tutorials.
-
Cross the Undercity and reach the Ruined Market. Wall-jump up its wooden platforms.
-
Find the large well, then climb the surrounding balconies to the rooftop.
-
Speak with the Spirit nearby for a clue about a concealed lever.
-
Enter the room beneath the rooftop and break the cracked wall beside the barrels.
-
Pull the revealed lever to uncover the well, then descend into the Central Sewer Drain.
-
Strike the glowing white orb on its pillar to open the next gate.
-
Activate the Mirror of Life before continuing through the Sewer Reservoir.
-
Use the reservoir's gate lever, descend into the Path of the Rat, and follow the lower passage past the cultists.
-
Reach the enormous sealed gate and drop into The Fallen's arena.
Fighting The Fallen
Dodge when an attack begins, then retaliate during recovery. Strike its thrown cross with a weapon or magic to counter the projectile.
Weapon hits rebuild Mana, allowing you to alternate physical attacks and spells. After winning, hold the prompted interaction button during absorption to claim the boss's Arcana.
| Milestone | Reward or purpose |
|---|---|
| Defeat The Fallen | Obtain its Arcana and the Holy Cross spell |
| Collect The Fallen's Key | Secure the first of three Catacombs gate keys |
| Continue through the sewer tunnels | Unlock the Arcane Whip |
| Explore Prison Tower | Find the guardian called The Warrior |
| Explore Holy Innocents' Cemetery | Seek Medusa beyond the Roman Baths for another key |
The Arcane Whip attaches to glowing anchors, letting Rose swing across gaps and climb new routes. The cemetery approach passes through the Court of Miracles and Bridge of the Millers. Activate the water-wheel crank, ride upward, and continue past the nearby save mirror toward the Burned District.
Choose weapons that fit the encounter
The seven weapon families differ in reach, timing, and how their grapple attacks work. Compare those properties alongside damage when choosing equipment.
| Weapon family | Main advantage | Limitation to manage |
|---|---|---|
| Longsword | Balanced attacks; grapple strike passes behind enemies | Needs positioning to capitalize on rear attacks |
| Sword and shield | Blocks damage and offers a strong shield-bash counter | Blocking reduces damage without eliminating it |
| Lance | Long reach and a charged projectile without Mana expenditure | Its second combo attack has an interruptible gap |
| Cestus | Consecutive hits build strong damage against isolated targets | Very short reach demands careful defense |
| Greatsword | Broad swings, powerful charges, and a spinning grapple attack | Slow attacks; charging can still cost health |
| Dual swords | Timed inputs unlock a powerful extended combo | Repeated untimed inputs produce weak attacks |
| Whip | Excellent melee reach and diagonal combo aiming | Close hits deal much less damage than tip hits |
With dual swords, watch for the flash near Rose's eye. Delay the next input to advance from the opening slash into the rapid stab, then time another input to reach the spinning attack.
For longswords, attacking immediately after a dodge improves your opening damage. Their grapple attack also pairs with Bile Trinket, which increases damage dealt from behind by 25%.
There are 44 relics, with three equipment slots available at once. Choose effects that support your weapon. Greatsword users should consider survivability because charge armor prevents interruption without making Rose invulnerable. For bosses, reconsider relics whose effects are difficult to trigger against one opponent.
Rescue Eleanor and navigate the Hall of Mirrors
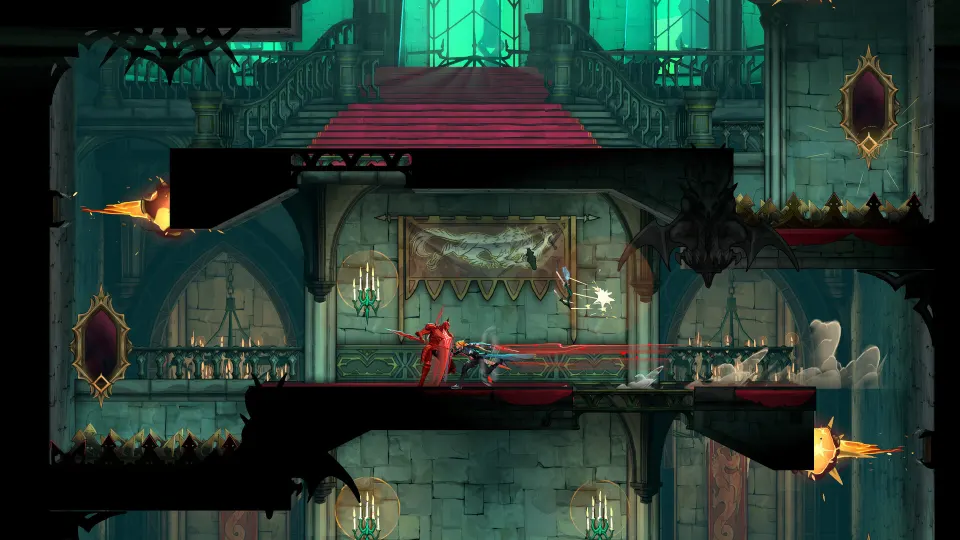
Completing the Hall of Mirrors unlocks the Sage Tarot, Mirror Walk Arcana, and expanded travel between previously used save mirrors.
Eleanor is trapped behind four locks. At the mirrors associated with those locks, hold crouch to enter hidden chambers. Break the lock above each entrance and survive the ensuing enemy gauntlet. After clearing all four, return to Eleanor's mirror and crouch to enter.
Descend through the initial mirror sets. At the bottom, move left and take the downward exit into the puzzle sequence. Normal map navigation is obscured here, so pay attention to reflections.
| Reflection or puzzle | What to do |
|---|---|
| Blue, translucent Rose in puzzles one and two | Hold crouch to reveal a pointing reflection |
| Ordinary reflection | Crouch to return to the current puzzle's starting area |
| Red reflection | Avoid activating it; the reflection attacks Rose |
| Flickering blue reflection with red flashes in puzzle three | Interpret its pointing direction in reverse |
The first two puzzles
The first puzzle has a direct route through its entrance area to an arena containing two stone golems. Defeat them, then use the mirror to the left of the larger golem to advance.
For the second puzzle, climb from the starting room. Use the swing anchors in the larger chamber to reach the upper section, then continue upward and left. Ascend through the enemy-filled passage and take the left exit at the top. In the next room, clear the enemies, reach the upper tier, and crouch before the central mirror.
The final puzzle
The third puzzle reverses the earlier clue: unstable reflections point away from the correct mirror. Following their gestures literally sends you in the wrong direction.
An optional Brave Heart lies along the descent through this section. From the starting area, drop past the first reflection into the room below, go right, and descend through the center of the next room. Moving left during the short fall leads toward its platforming challenge.
Track completion and prepare for the ending
Revisit earlier regions after major movement upgrades and after unlocking expanded mirror travel. Later destinations include the Clock Tower, Library, Main Hall, and Notre-Dame.
Community players report that map colors help identify unfinished collection work.
| Completion indicator or category | What to check |
|---|---|
| Blue map areas | Players report that collectibles remain |
| Gold map areas | Players report that collection is complete |
| Gold doors | Players report that the associated interior is complete |
| Character improvements | Check ATK, DEF, health, and Mana upgrades |
| Equipment and exploration | Track weapons, relics, Arcana, hidden paths, and challenge rooms |
For the true ending, community reports describe these requirements:
-
Collect all 15 Arcana cards.
-
Complete the four trials at Notre-Dame to unlock Absolution.
-
Return to Dracula and defeat his second phase.
-
Cast Absolution on him to finish the encounter.
Players also report returning to a save point after an ending, allowing continued exploration and collection.
FAQ
What should I prioritize on my first visit to Paris?
Use this castlevania belmont's curse guide to reach The Fallen, obtain the Arcane Whip, and establish reliable save points. Those objectives provide the foundation for exploring the next regions.
Why can I not open the Catacombs gate?
The gate requires three keys. The Fallen provides only the first, so defeating the opening boss does not immediately unlock it.
How do I travel between save mirrors?
Complete Eleanor's Hall of Mirrors quest to unlock expanded travel between previously used save mirrors. Crouching before mirrors is central to entering the hidden mirror areas and navigating their puzzles.
Can I equip more than three relics?
You can equip three relics simultaneously. Change your combination to suit exploration, crowded encounters, or a particular boss.
How do I recover when lost in the Hall of Mirrors?
Crouch before a mirror showing an ordinary reflection to return to the beginning of your current puzzle. Avoid red reflections, which attack when activated.